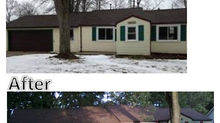
Bland Door to Barn Door
- Brandi
- Jun 5, 2019
- 3 min read
Updated: Nov 29, 2021
Have a room that is small and has a door that swings open to block the bathtub/closet and you tend to run into as you get ready in the morning?
It's time to repurpose that basic door and get your gliding barn door game on.
Over the past 6 years at The Shire, it's been dark when showering with the door open as it shaded the light. Drying your hair or doing make up was a tough gig, with the doorknob readily available to reach out and awkwardly grab you. I wear a lot of flowy clothing and have caught many sweaters on it halting me in my tracks with a soft and annoyed "crud muffins" to follow.
I had enough! So, like most projects, I sat on my bed and stared at the door. Walked away...and came back to stare again for an "Ah HA!" moment. Wouldn't you know it came to me while in the "bathroom"? Most ideas are born in that room, aren't they? Stop it...the shower ideas I mean...
"Everyone who's ever taken a shower has an idea. It's the person who gets out of the shower, dries off and does something about it who makes the difference." - Nolan Bushnell
In this case, it being the bathroom shower wall, it didn't allow for a pocket door. Barn Door styles have made it simpler to enlarge your space without having to save for a huge renovation.
The prefab barn door rail did come with image instructions only...neat, right? (face plant into hands)
Multiple DIY videos were viewed before going to work, since the instructions were so amazing (not!). Each video gave me clarity on how to do it well and properly. Take your time and think it through. Go in armed with helpful tips. The most helpful, being that the header board will hold the rail snug. The header board goes into the studs. The rail at that point is fastened to the header for extra strength. The door being solid oak we definitely needed the strength to hold it tight.

Note: I did learn that my kit came with metal anchors for the rail screws/spaces. I didn't use them as when I first hung it with them, they spun and didn't secure the rail 100%. I then had to pull the rail down and reattach with just the screws and new holes. This was done after watching a few more DIY videos to ensure no one else used them. ***Always be sure to follow your instructions as your rail may differ!**
Most of this project is a 1-person job. Just placing the header board and rail up does need another set of hands to assist with holding it in place for marking/measuring.
Hope you find this fun and not so overwhelming as it may seem. The feeling of accomplishment and door freedom is outstanding.
Crafty Crap Ingredients:
Door - Free solid oak door from sister
Hardware/Knobs - Hobby Lobby 1/2 sale = $7.00
Barn Door Rail - Asked for it as a gift one year so FREE
Header Board (Green Board) - Lowe's $10.00
Paint/Stain for Header Board - Lowe's ($3 oops paint)
Screws for the Header Board = Lowe's (3.00)
Total Project: $ 25.00
Tools Needed:
Note, some barn rails may call for different tools! Read and follow the instructions carefully.
Drill
Drill Bits
Socket Wrench Set
Measuring Tape
Screws
Scissors
Pen/Marker/Pencil
Vacuum
Ladder/Step Stool - If you're 5' like me
ABC's of Creation:
Paint/Stain the Header Board
Find wall studs and screw the Header Board to it. Be sure to use long enough screws.
Measure for the rail to hang nicely in contrast to the door you're using. Be sure to measure this a few times.
Drill and hang the rail according to the instructions provided.
Door time!
Stain it
Added the film to the windows to obstruct view for privacy
Added the knobs as desired. Note: I did get different knobs for each side based on each room's decor/theme. It spices it up a smidge.
Measure and place the rollers on the door per the instructions.
Hang the door
The door floor guide they provided was too short. I repurposed a curtain tie back as the new decorative door guide. Outside the box can be so fun.
Remove the basic door before or after. I did it after to ensure all went well. Just have to paint and sand a few spots where the hinges and plate once lived.
The Shire is very imperfect like it's owner...that's part of the charm, right?
Fun Fact: The old door will be painted and used in the garden as a fence. A vine will grow over it as decorative boarder to keep our amazing horse of a dog (St. Bernard Mix) out of that part of the yard. Watch for that wild post is to come in the future.
Happy Hanging!


Comentários